Article Contents:
Overview
Creating a Single Worker Account
How Workers can Create their own Account
Creating Multiple Worker Accounts at Once
Common Error Messages
Editing Worker Information
Deactivating Worker Accounts
Overview
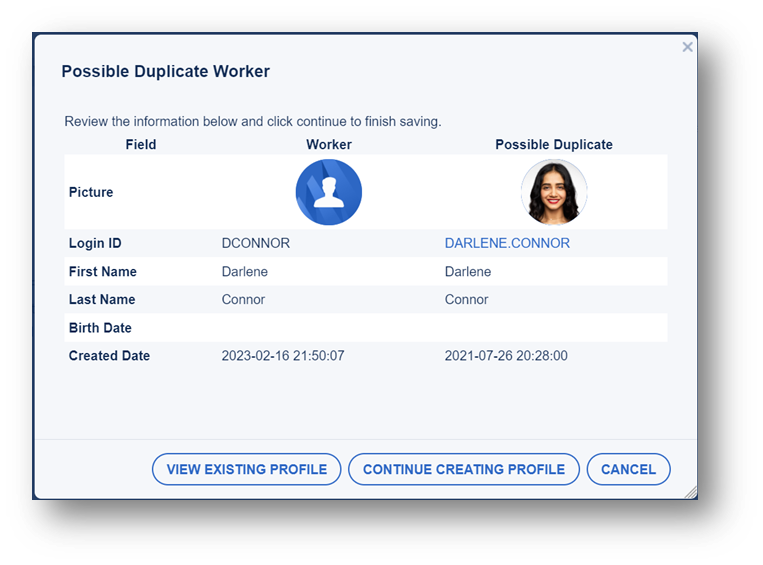
Suppliers with the "Workers" permission and Clients with the "Manage Supplier Workers" permission can create Worker accounts in Worker Management. Users have the option to create a single Worker or multiple Worker accounts at once. They can also send a registration link the Worker can use to create the account themselves. Before adding a Worker, you should search existing Workers to avoid creating a duplicate account. Since Clients add Workers on behalf of a Supplier, if they try and create a duplicate account, they will see a pop-up giving them the option to review the existing account to determine if it is a duplicate or not.
Creating a Single Worker Account
Here's how to create a single Worker account:
- Click Accounts
- Select Manage Workers
- Click Create New from the side "Actions" menu
- Enter required information in the "Worker" and "Contact" tabs of the "Worker Edit - New" screen
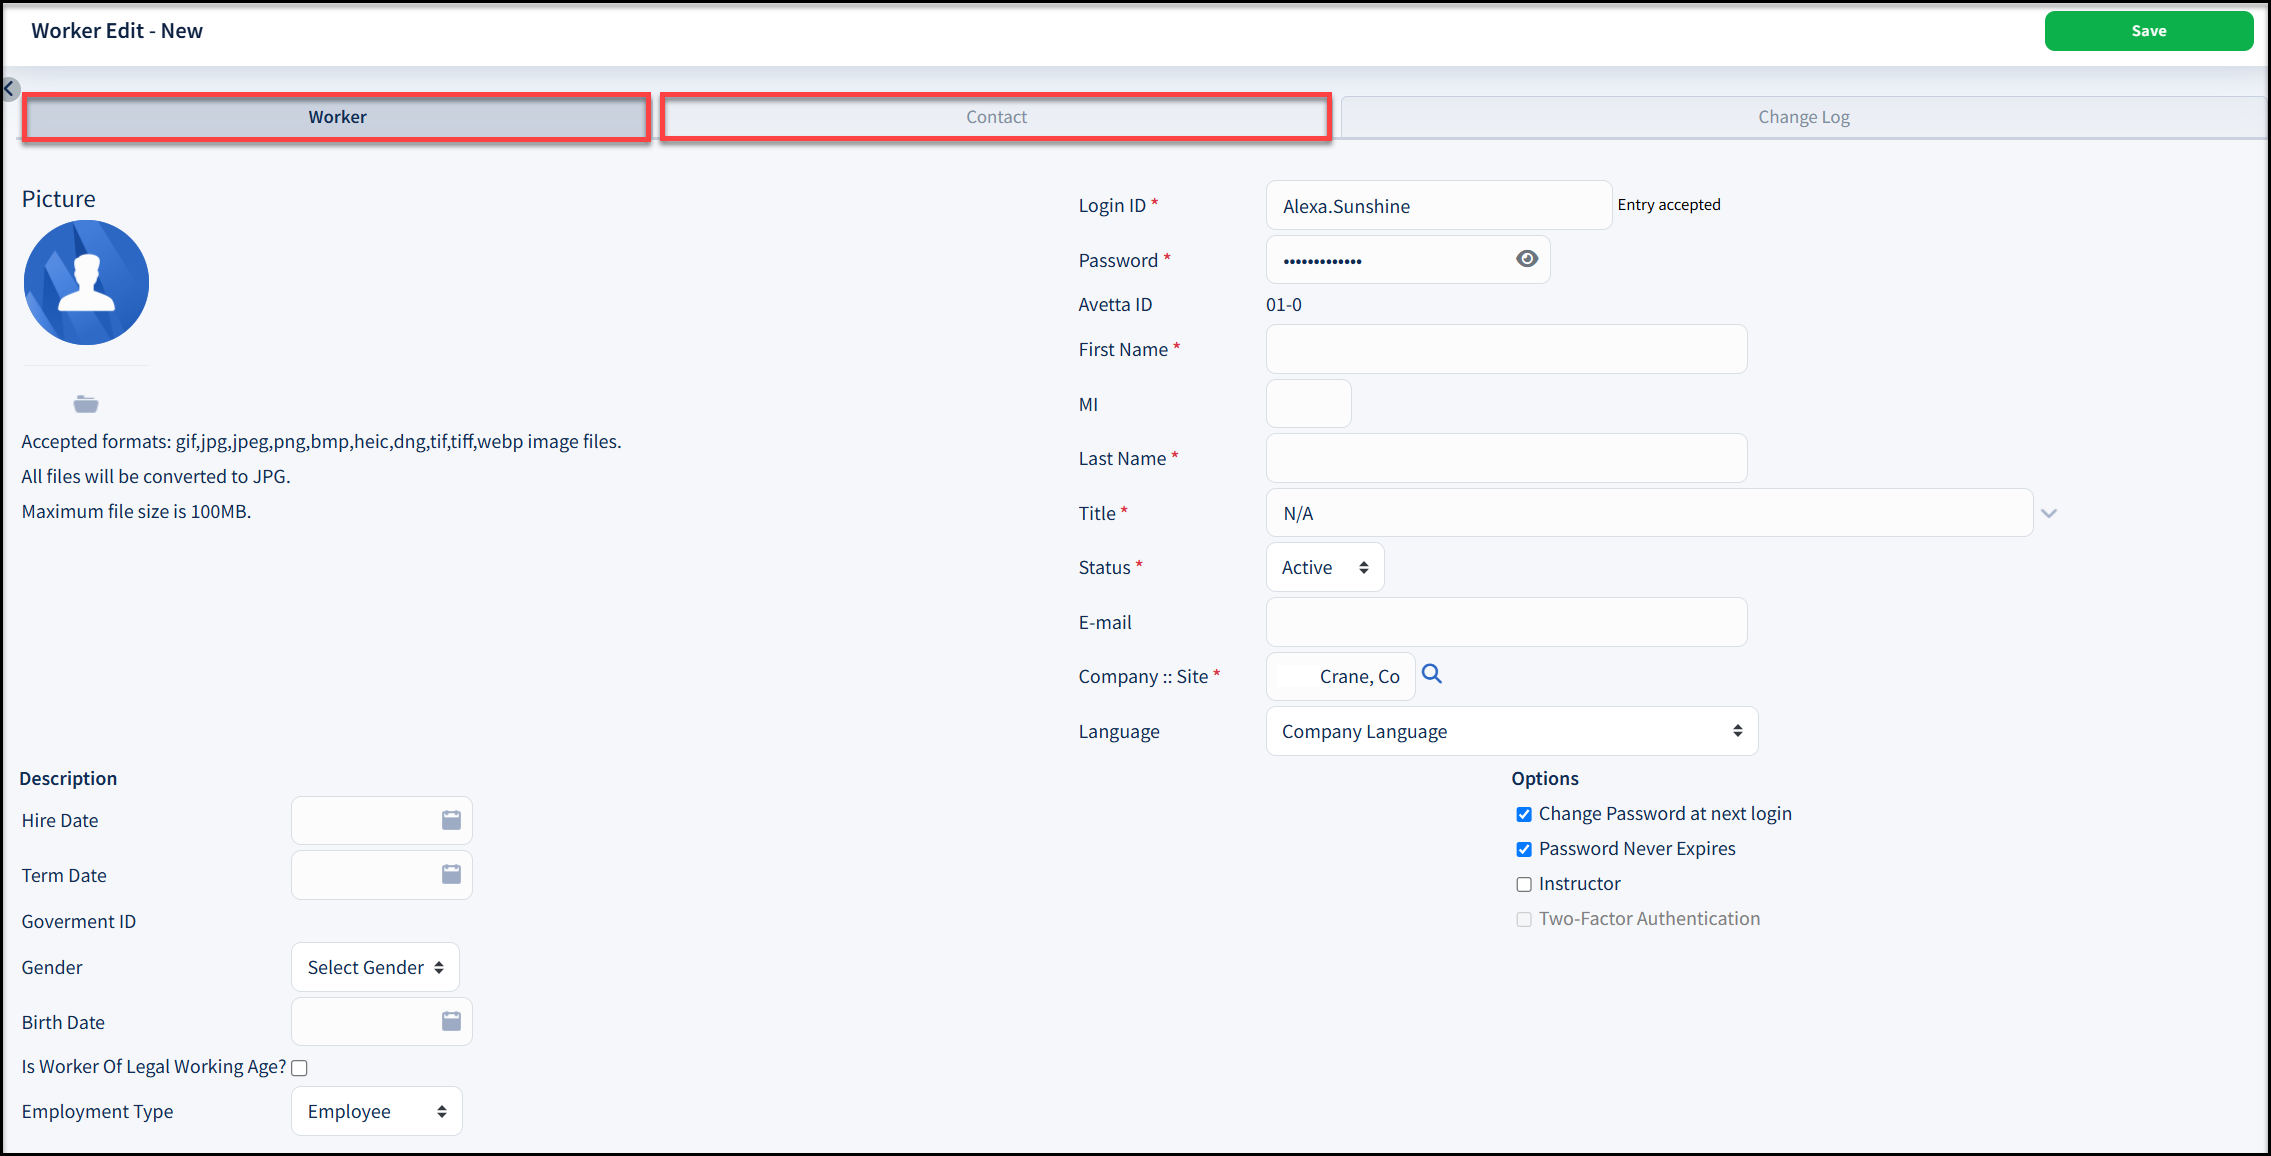
-
- Be sure to add the user's E-mail address so that they receive a new user account email with instructions to log in and get started
- If an email address isn't provided, you will need to let the Worker know their login ID and password
- Click Save
- Additional tabs will appear once the user is saved so you can assign any necessary permissions, roles and sites (the tabs that show vary based on permission).
- Roles and sites must be assigned to new users so they can see their requirements
- See Assigning Sites and Roles to Workers | Worker Management

How Workers Create their own Account
If you send Workers a registration link, it is up to the Worker to log in and create their own account. Once created, you will need to assign sites/roles to the Worker. Here's how to send a registration link to your Workers:
- Click Accounts
- Select Manage Workers
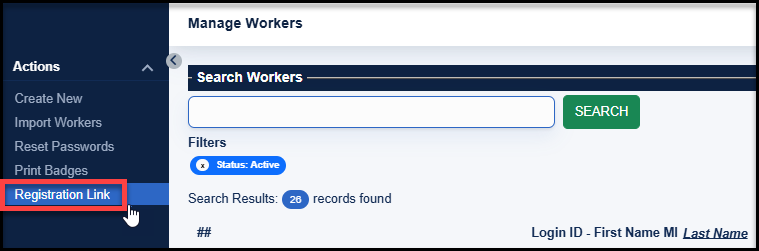
- Click Registration Link from the side "Actions" menu
- This option must be configured on your account for it to show
- Copy and paste the link provided in the "Registration Link" screen and e-mail it to the Worker
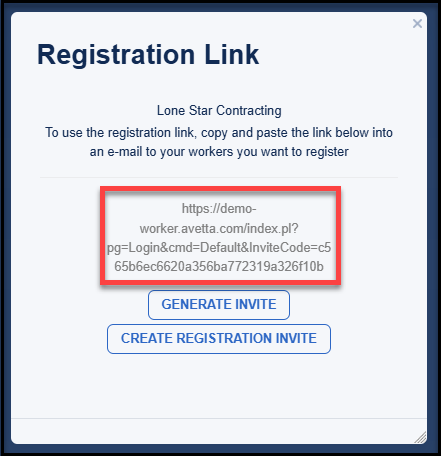
-
- Selecting Generate Invite creates a new link to send.
- Selecting Create Registration Invite opens up a drafted email with the link included that you can send to the Worker
Creating Multiple Worker Accounts at Once
This method of creating an account is useful if you have several different Worker accounts to create, however assigning the site/role is a separate workflow. When this option is selected, you will be required to upload a CSV file with all the required information filled out for each Worker. Avetta provides you with templates to use so you know what information needs to be filled out.
Here's how to create multiple Worker accounts at once:
- Click Accounts
- Select Manage Workers
- From the side "Actions" menu, click Import Workers
- Choose desired CSV template:
- For a template with only required fields, click Required Fields Example File
- For a template with all available fields, click All Fields Example File
- Save template to your desktop and fill out all required fields
- Click the folder
 icon next to the "Import Document" field to select the saved template
 - Select Tab or Comma in the "Field Separator" field depending on your formatting (Comma is most common to use)
- Click Continue from the side "Actions" menu
- Update any header rows to match the provided information as needed
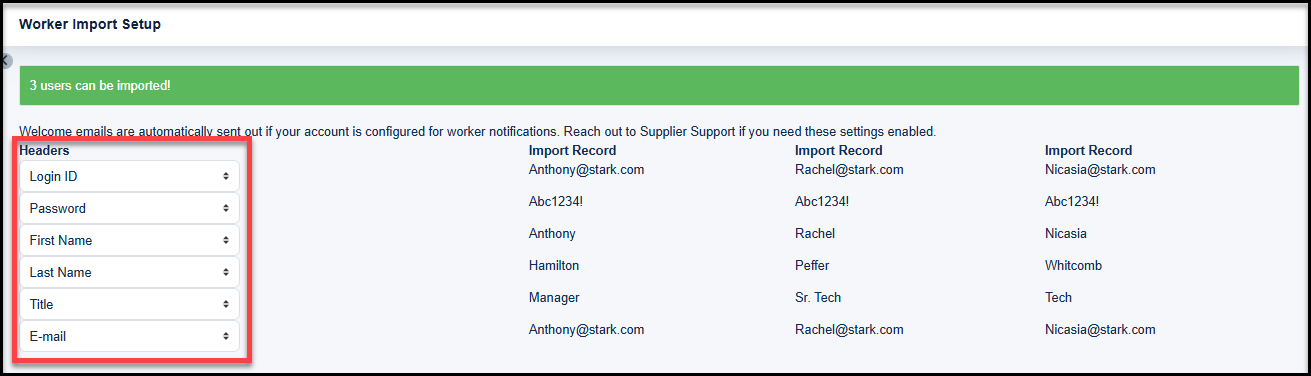
- Click Continue from the left "Actions" menu
- A confirmation message indicates the number of users imported
- Up to a hundred users can be immediately imported. Lists with over a hundred users are sent to a queue for processing and may take longer.
- Once the Workers have been imported, you must assign roles and sites to them so they can access their requirements
Common Error Messages
Here are some common error messages you may see when trying to import Workers in bulk and what they mean:
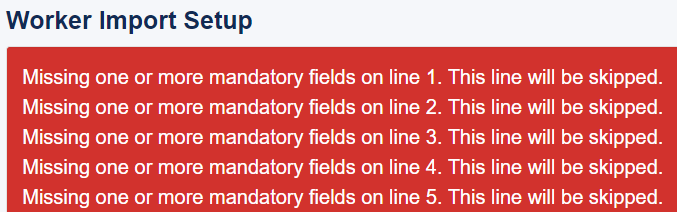
- The following error message displays if a user has left a mandatory field blank.

- The following error message is most likely displaying because the user has selected the "Tab" instead of "Comma" format. You can tell because all of the user information is showing as a single omitted field so it is impossible to assign an applicable Header to the field.

- If the following error message appears over and over and no users can be added at all, it most likely means you have not entered the worker information using the same format as shown in the Example Import doc.
- The following error message indicates duplicate user information has been found across users.

Editing Worker Information
Here's how to edit a Worker's information:
- Search for the desired Worker in the Universal Search bar
- Click the three horizontal dots next to the desired Worker results
- Click Edit Worker
- The following tabs are available for editing:
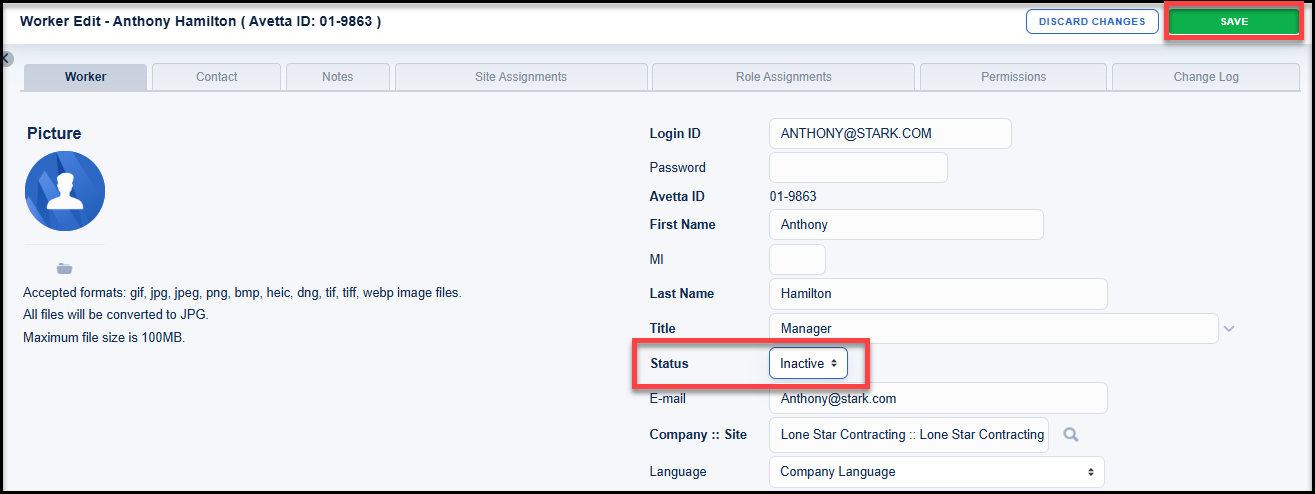
- Worker – Manage name, login, password, active\inactive status, email, site, and language options. The site selected in this window determines who may manage this Workers' assignments.
- Contact – Enter address and phone contact information
- Notes – Enter any free form information about the Worker
- Site Assignments - This screen lists the Client companies assigned to the Worker. Use the Add Site menu option on the left to add the Worker to additional sites. Use the trash can icon to delete sites.
- Role Assignments – This screen lists the roles assigned to the Worker. Remember, a role is a defined position containing jobs, tracks and\or requirements. Click this tab and select the Add Roles or Drop Selected options to change the roles assigned to the Worker.
- Permissions – In this tab, Workers can be given Worker Management administrator privileges
- Check In and Check Out - In this tab, Clients can check the Worker in and out of a site
- Change Log – This screen displays the changes made, who made them and date they were made to the worker's record
Deactivating Worker Accounts
- Search for the desired Worker in the Universal Search bar
- Click the three horizontal dots next to the desired Worker results
- Click Edit Worker
- Click on the "Status" drop-down menu and select Inactive
- Click Save
BACK TO TOP