Article Contents:
__________________________________________________________
Summary
Avetta is a Software as a Service (SAAS) company that offers Supply Chain Management and Risk Mitigation Solutions to Company's who manage multiple contractors and Suppliers. Avetta works with Clients and Suppliers to ensure company's performing work are qualified, licensed, and safe through vetting of safety statistics via our platform called Connect.
If you do work with a Client who uses Avetta to help them manage their supply chain, you will be contacted to register either by an Avetta representative or by your Client. You can also register independently and use Avetta to find potential Clients. Supplier Registration in Connect is completed in multiple parts: Creating an Account, Finding Connections, filling out a Service Evaluation, Checking Out, and completing basic profile information.
Best Practices
- Use your registration link - If you receive an email inviting you to register, always use the link provided in the email to access the registration page. This ensures you are connected to the correct Client site(s).
- Include all types of work performed - When answering pre-registration questions, include all types of work you perform, not just the work for a specific Client.
- Use your legal company name - The legal company name should be used when creating the account. This helps company's find and connect with you and streamlines your compliance.
- Use your email as your username - Enter your email address as your username to make it easier to remember or recover your login information.
- Assign the correct Primary User - The Primary user should be the person responsible for managing Avetta compliance.
Creating an Account
If you have been asked to register directly by your Client, you should use the registration link they provide to you.
To create an Avetta account without a registration link, go to https://app.avetta.com/registration.
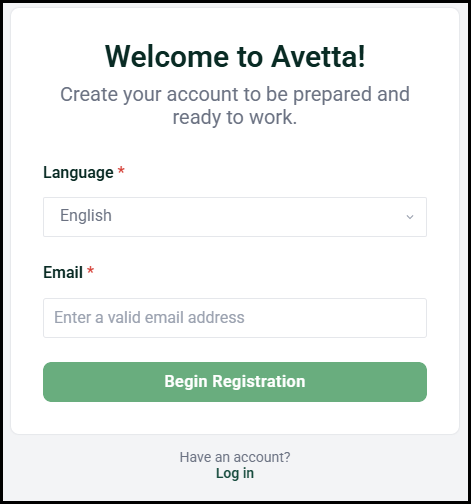
Welcome to Avetta!
Complete the following required fields:
- Language
- This automatically defaults to the browser's selected language. Select your preference from the dropdown.
- Business Email
- If you are registering through a direct link, this will pre-populate but can be edited if necessary.
- Click Begin Registration.
- This button will be disabled until both required fields are filled out.
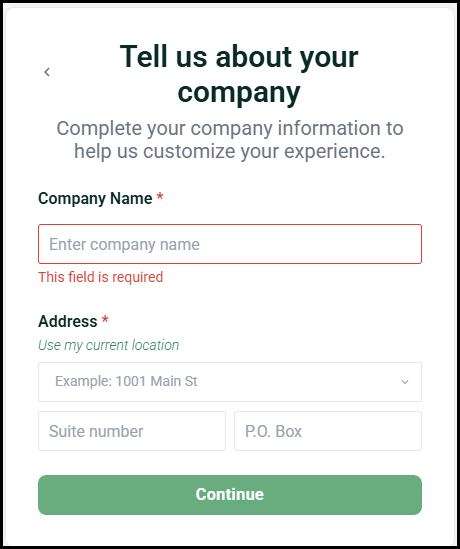
Tell us about your company
Complete the following information:
- Company Name
- Use your company's legal name for this field. A "Doing Business As" name can be added once you gain access to your profile.
- Address
- Click Continue.
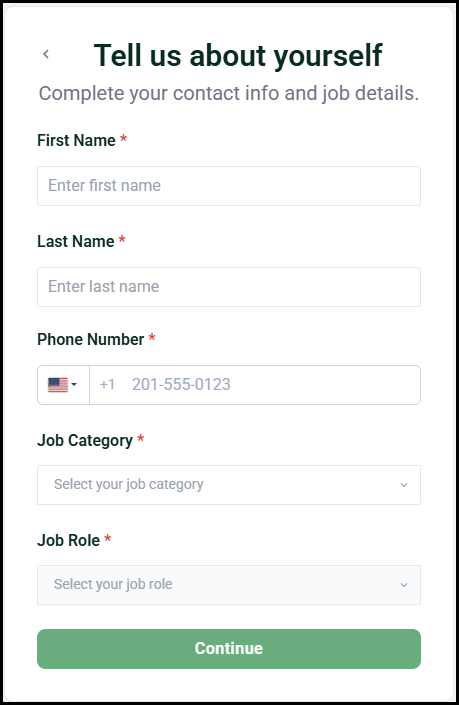
Tell us about yourself
Enter your contact information:
- First Name
- Last Name
- Phone number
- Job category
- Select the sector of your business that most closely covers your role.
- Job role
- Select a job title that most closely relates to you.
- Click Continue.
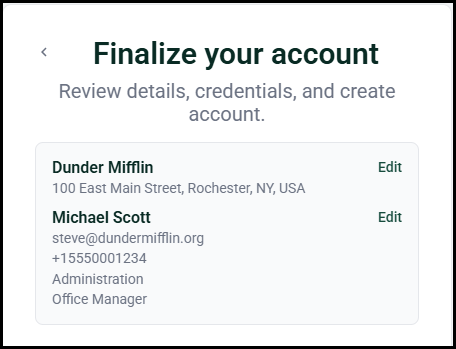
Finalize your account
- Review all the information you've entered, and click Edit to change anything before finalizing your account.
- Create your username and password.
- Password requirements will show once you have clicked into that field.
- Read through all policies and agreements before selecting the checkboxes indicating you agree to them.
- You must select the "Auto-Renewal and Upgrade Disclosure" link to review before the checkbox will enable.
- Click Create Account.
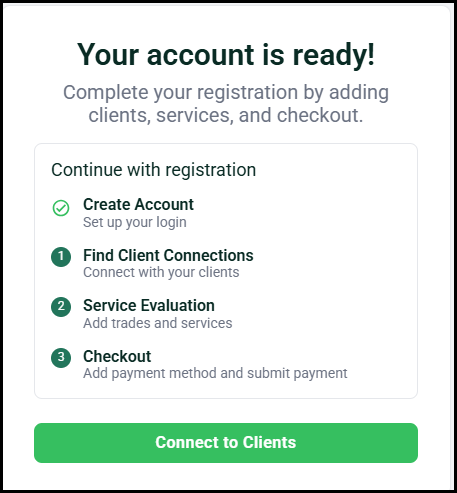
- A confirmation screen will show next steps in registration, which will personalize your account before you access your profile.
Finding Client Connections
Once you have clicked "Create Account", you can select Client sites to add to your network. If you wish to continue registration without connections, refer to Join Directory below.
Connecting with Clients
There are two ways to connect with Clients during the registration process: searching by name or adding by recommendation.
- Search By Name
- Type a Client name in the Search bar.
- If a Client has added a "Doing Business As" (DBA) name to their account, this name can also be used to search for them.
- Add by Recommendation
- A list of Clients in our Network will show, based on the proximity to the address you provided
- Click Add next to the Client you would like to Connect with from the list of possible connections.
- Once added, the Client will appear on the right side of the screen.
- Click the red X next to a Client site name to remove them as a connection.
- Note that if you were invited by a Client or Supplier and use the registration link in the invite email, that Client or Supplier along with any preferred sites they have requested you connect with will automatically be added as a connection.
- If you are a Subcontractor, click the checkbox under "Manage Client Connections" saying your contractor asked you to join Avetta. A text box will appear, where you can enter their Avetta ID. You must then select at least one applicable Client site they are connected to to be added as a Subcontractor connection in their Network.
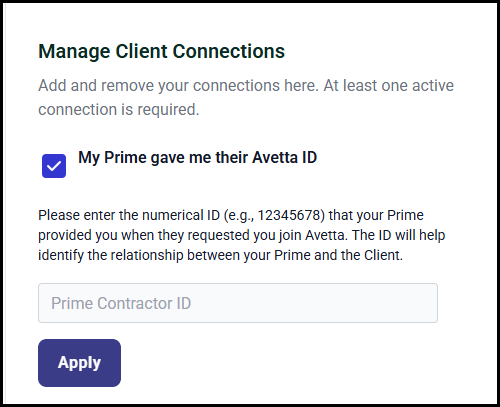
- After selecting your desired Client site(s), click Next.
Join Directory
If you are registering for Avetta without invitation from a Client, you can still complete your profile and add connections later.
- Select Join Directory on the toggle.
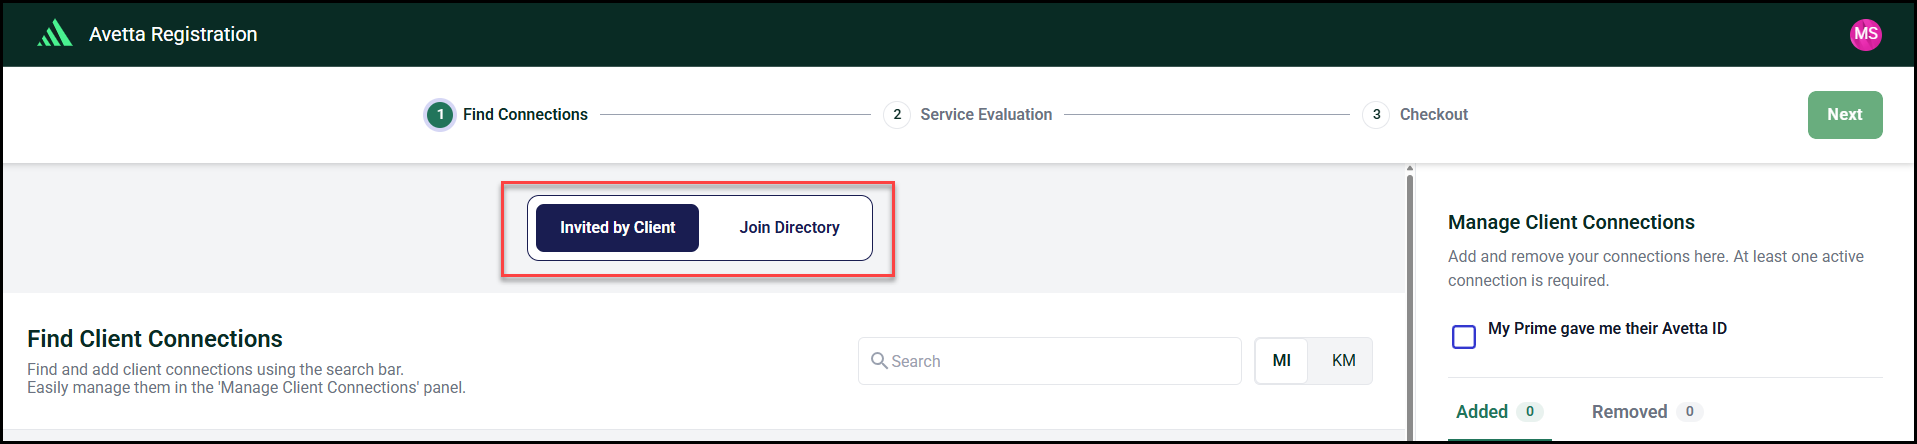
- A screen will show what you will get with your membership by selecting the directory option.
- Click Next to continue to Service Evaluation.
Note: Once you add a Client connection, the toggle will disappear. Remove the connection if you wish to only join the directory. This toggle will not show if you used an invitation link to register.
Filling out the Service Evaluation
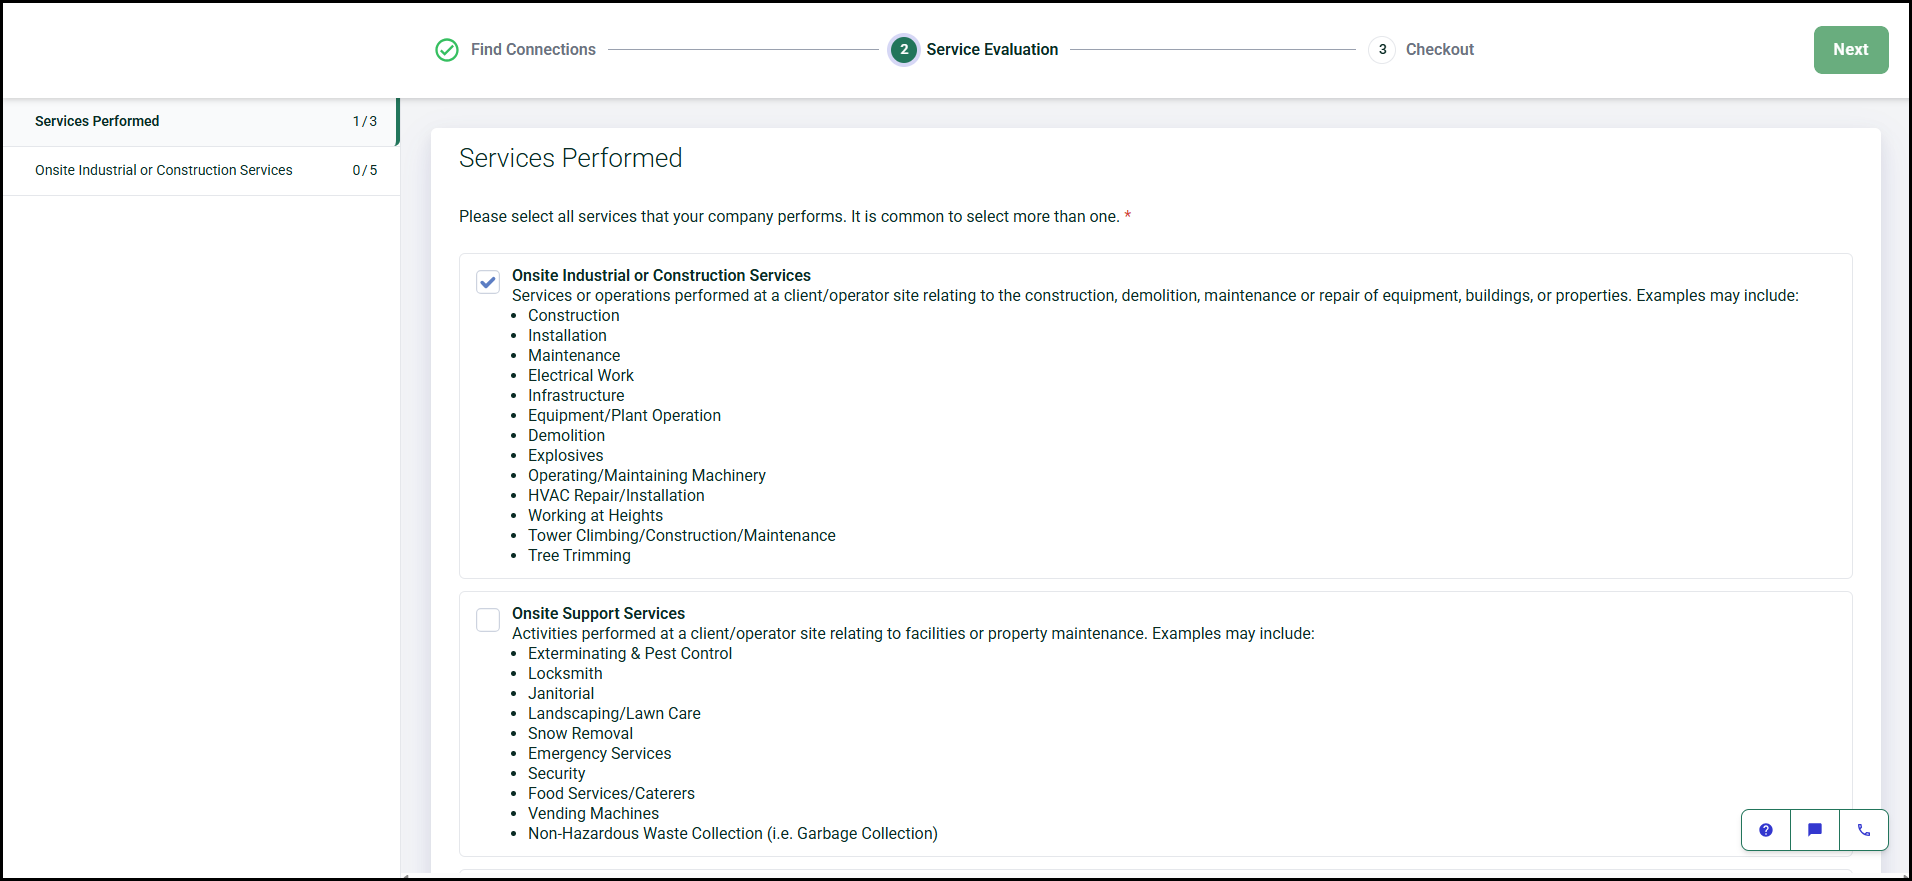
In the "Service Evaluation" section, you will answer questions regarding the services your company performs. Based on your answers, you may be required to answer more questions and will see more sections populate in the navigation bar. You can track the progress of your documentation by viewing the progress bar along the top of the evaluation.
Click the arrows below the questions to continue to the next question. If you need to go back to a previous section, select that section from the navigation menu.
- Select all services your company performs.
- TIP: It is common to select more than one service; select all that apply.
- Select Yes or No for all questions.
- TIP: These questions help Avetta determine your safety profile. Based on responses to certain questions, additional questions may appear.
- When all sections have been completed, the Next button will enable.
Checking Out
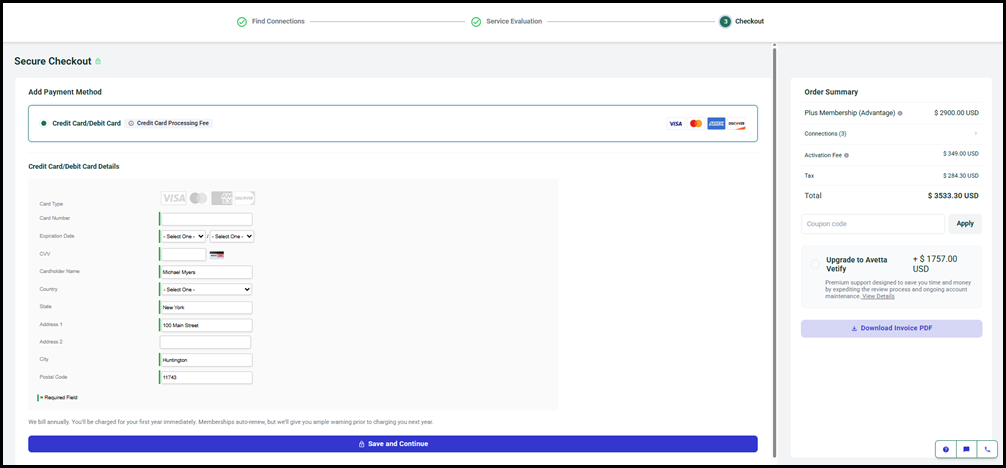
The last step of registration is finalizing your membership plan and checking out. Pricing is determined by the number of Client connections and the Service Evaluation.
- From the "Checkout" menu, review the membership plan on the left.
- If applicable, enter a Coupon Code, then click Apply.
- From here, you can also add Avetta Vetify to your account.
- Complete all required billing information fields.
- Certain payment methods may incur a processing fee.
- If you have a $0 bill due at registration, you can register without entering a payment method by clicking Register Without Saving Payment or add a payment method so you don't have to at a later date.
- Click Download Invoice PDF to keep a copy of your invoice for your records.
- You will also have access to all invoices within your account in the Profile > Membership section.
- Click Save and Continue to save a selected payment method.
- Click Confirm Payment and Registration.
For more assistance, contact our Compliance Specialists. See our Contact Us page to find your local support number; they can assist you through the process and help you become compliant (green-flagged), and ready to start work with your Client.
Profile Setup
After completing Checkout, you will be prompted to provide information about your company, primary trade, office location and service area. This helps Clients discover you and increases task accuracy.
Note: If you click Skip for now on any step, you'll be prompted to complete that information each time you sign in until it is provided.
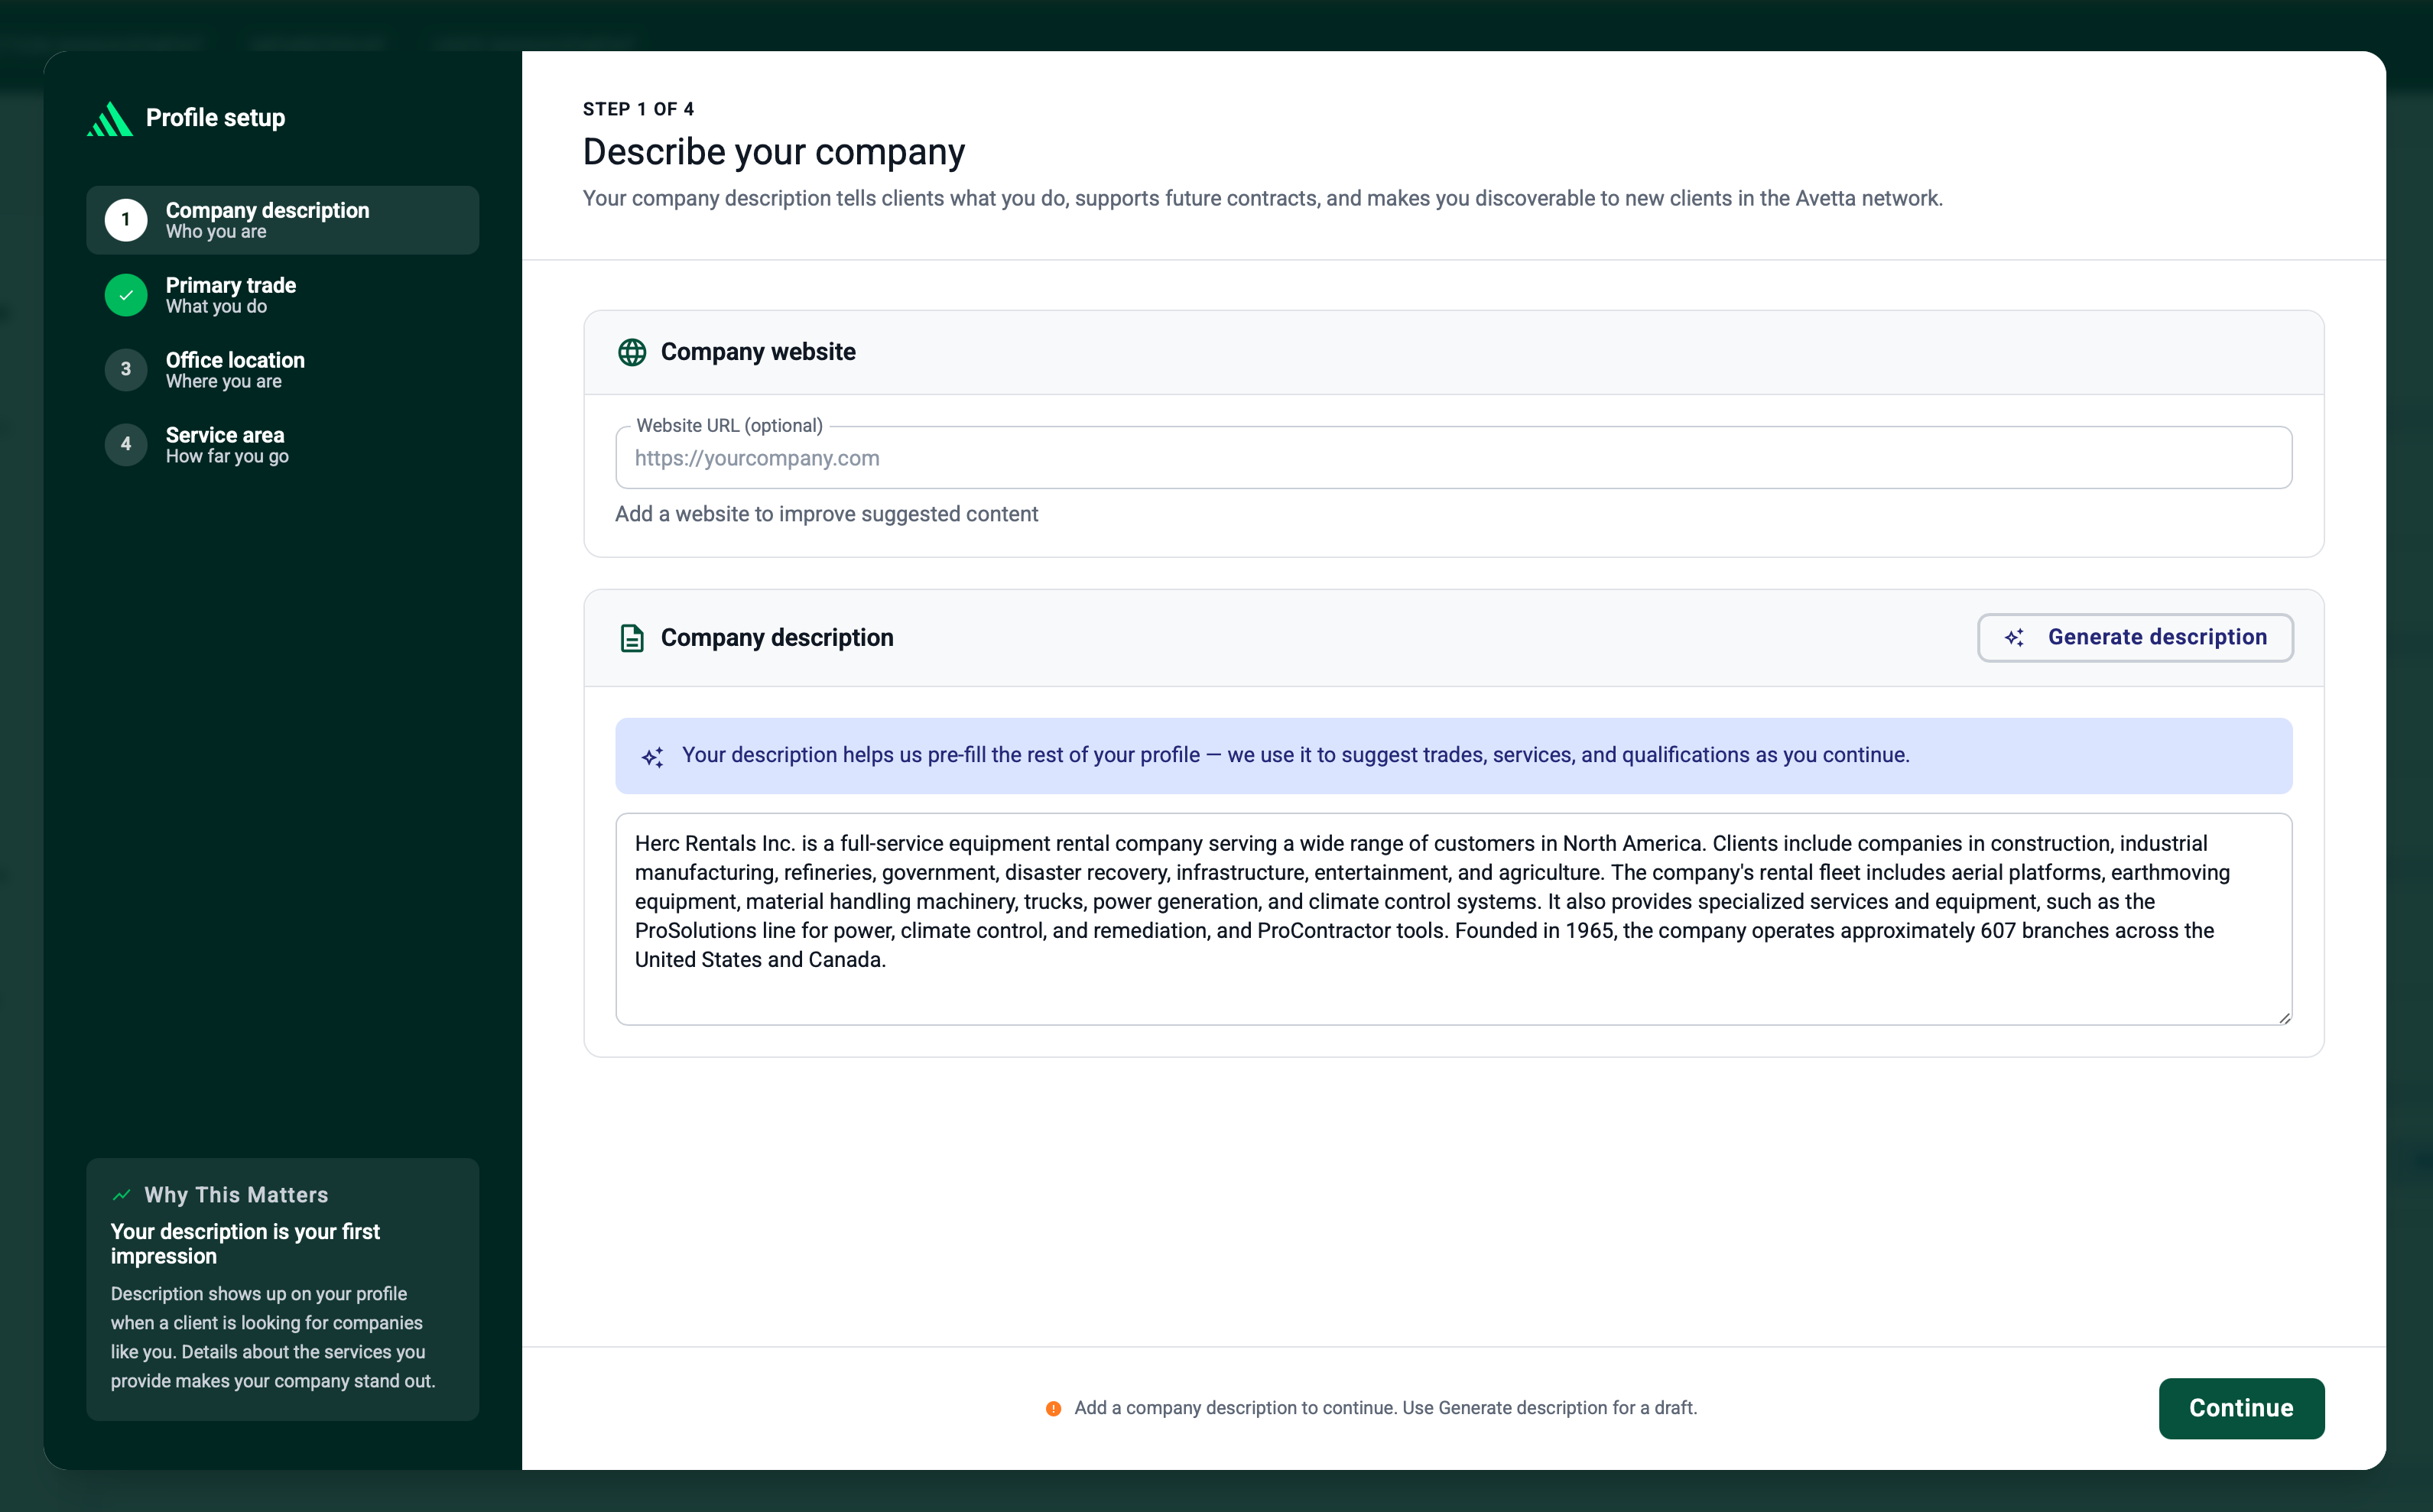
Describe your company
- Enter your company website.
-
This helps the AI generate a suggested company description.
- Enter your company description.
- Click Generate description to have AI suggest a description using your website.
- Click Continue.
Add your primary trade
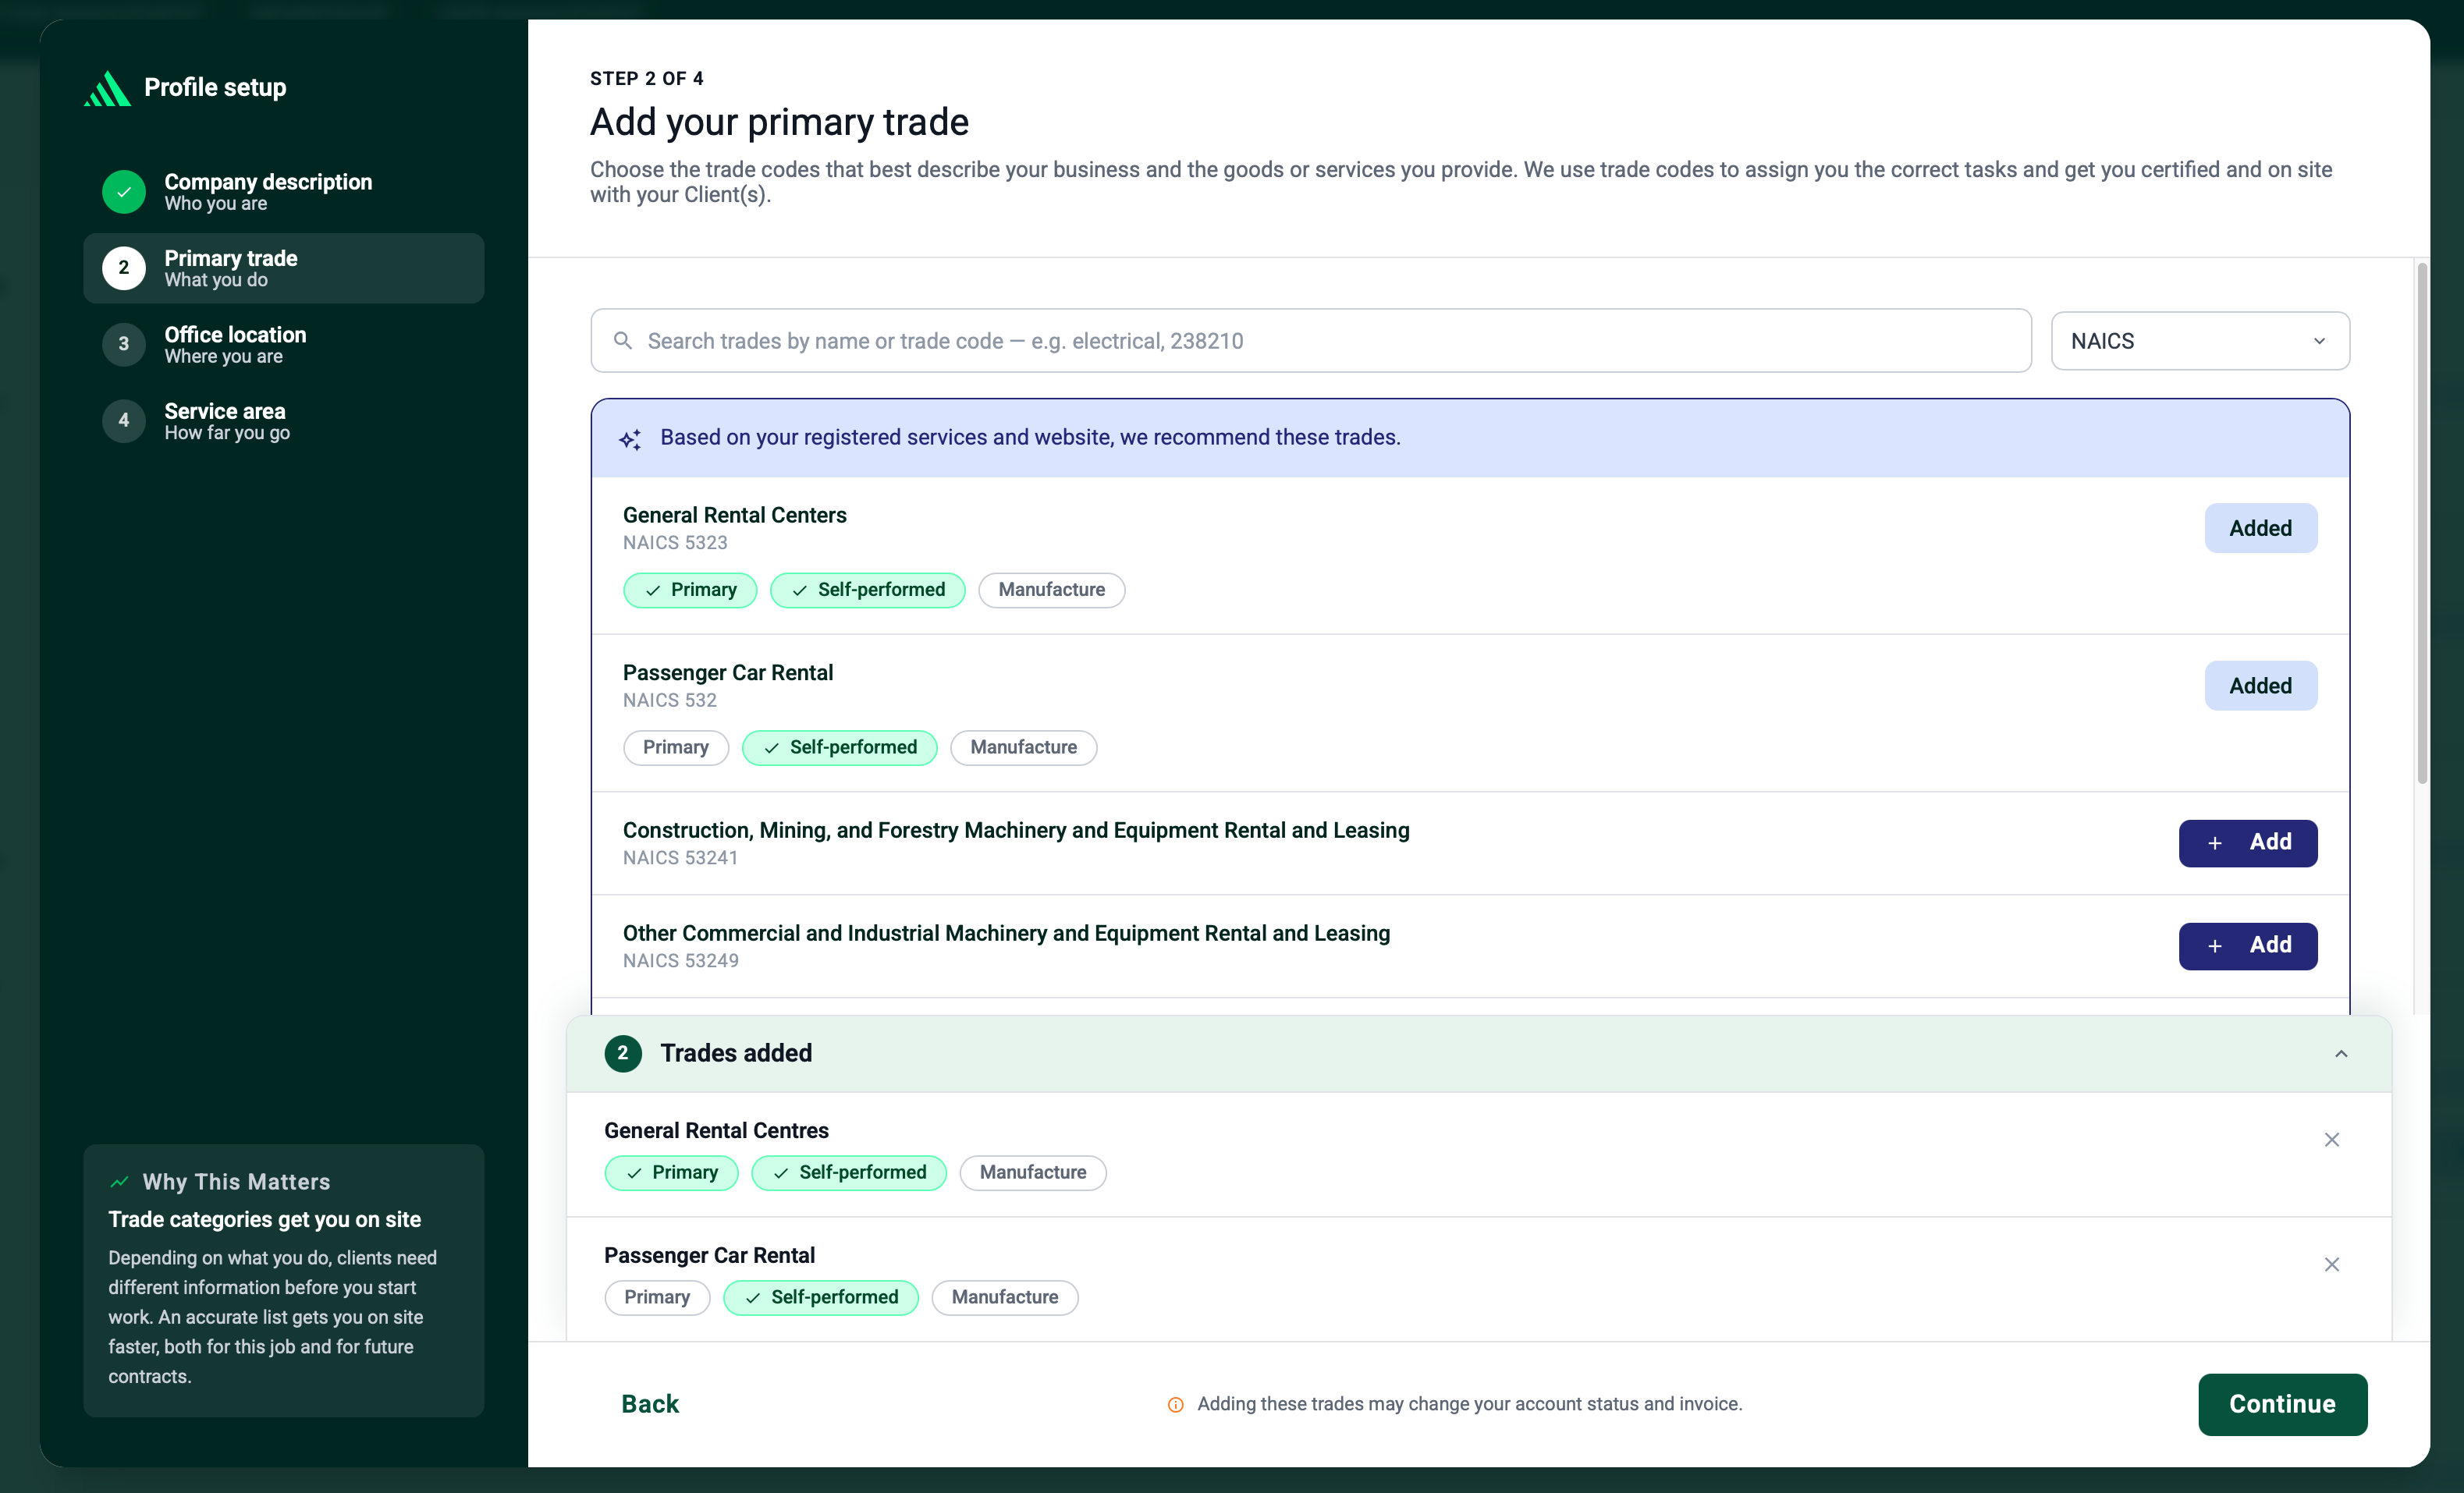
Use this step to enter your performed trades, select one as a primary trade, and indicate if they are self performed. Note that this is separate from your Service Evaluation.
- Use the search box to find trade(s) by name or code.
- If you entered your website in the previous step, recommended trades will populate.
- Select Add next to desired trade(s).
- Once you have added a trade, select the buttons that accurately describe the trade:
- Primary: The trade that represents 50% or more of the type of work your company performs.
- Only one trade can be marked as Primary.
- Self-Performed: A trade for work your company performs directly, rather than through subcontractors.
- Manufacture: A trade for a product your company manufactures under that trade name.
- Click Continue when all your trades have been added.
Note: Certain trades may incur extra charges due to higher risk.
Add your office location
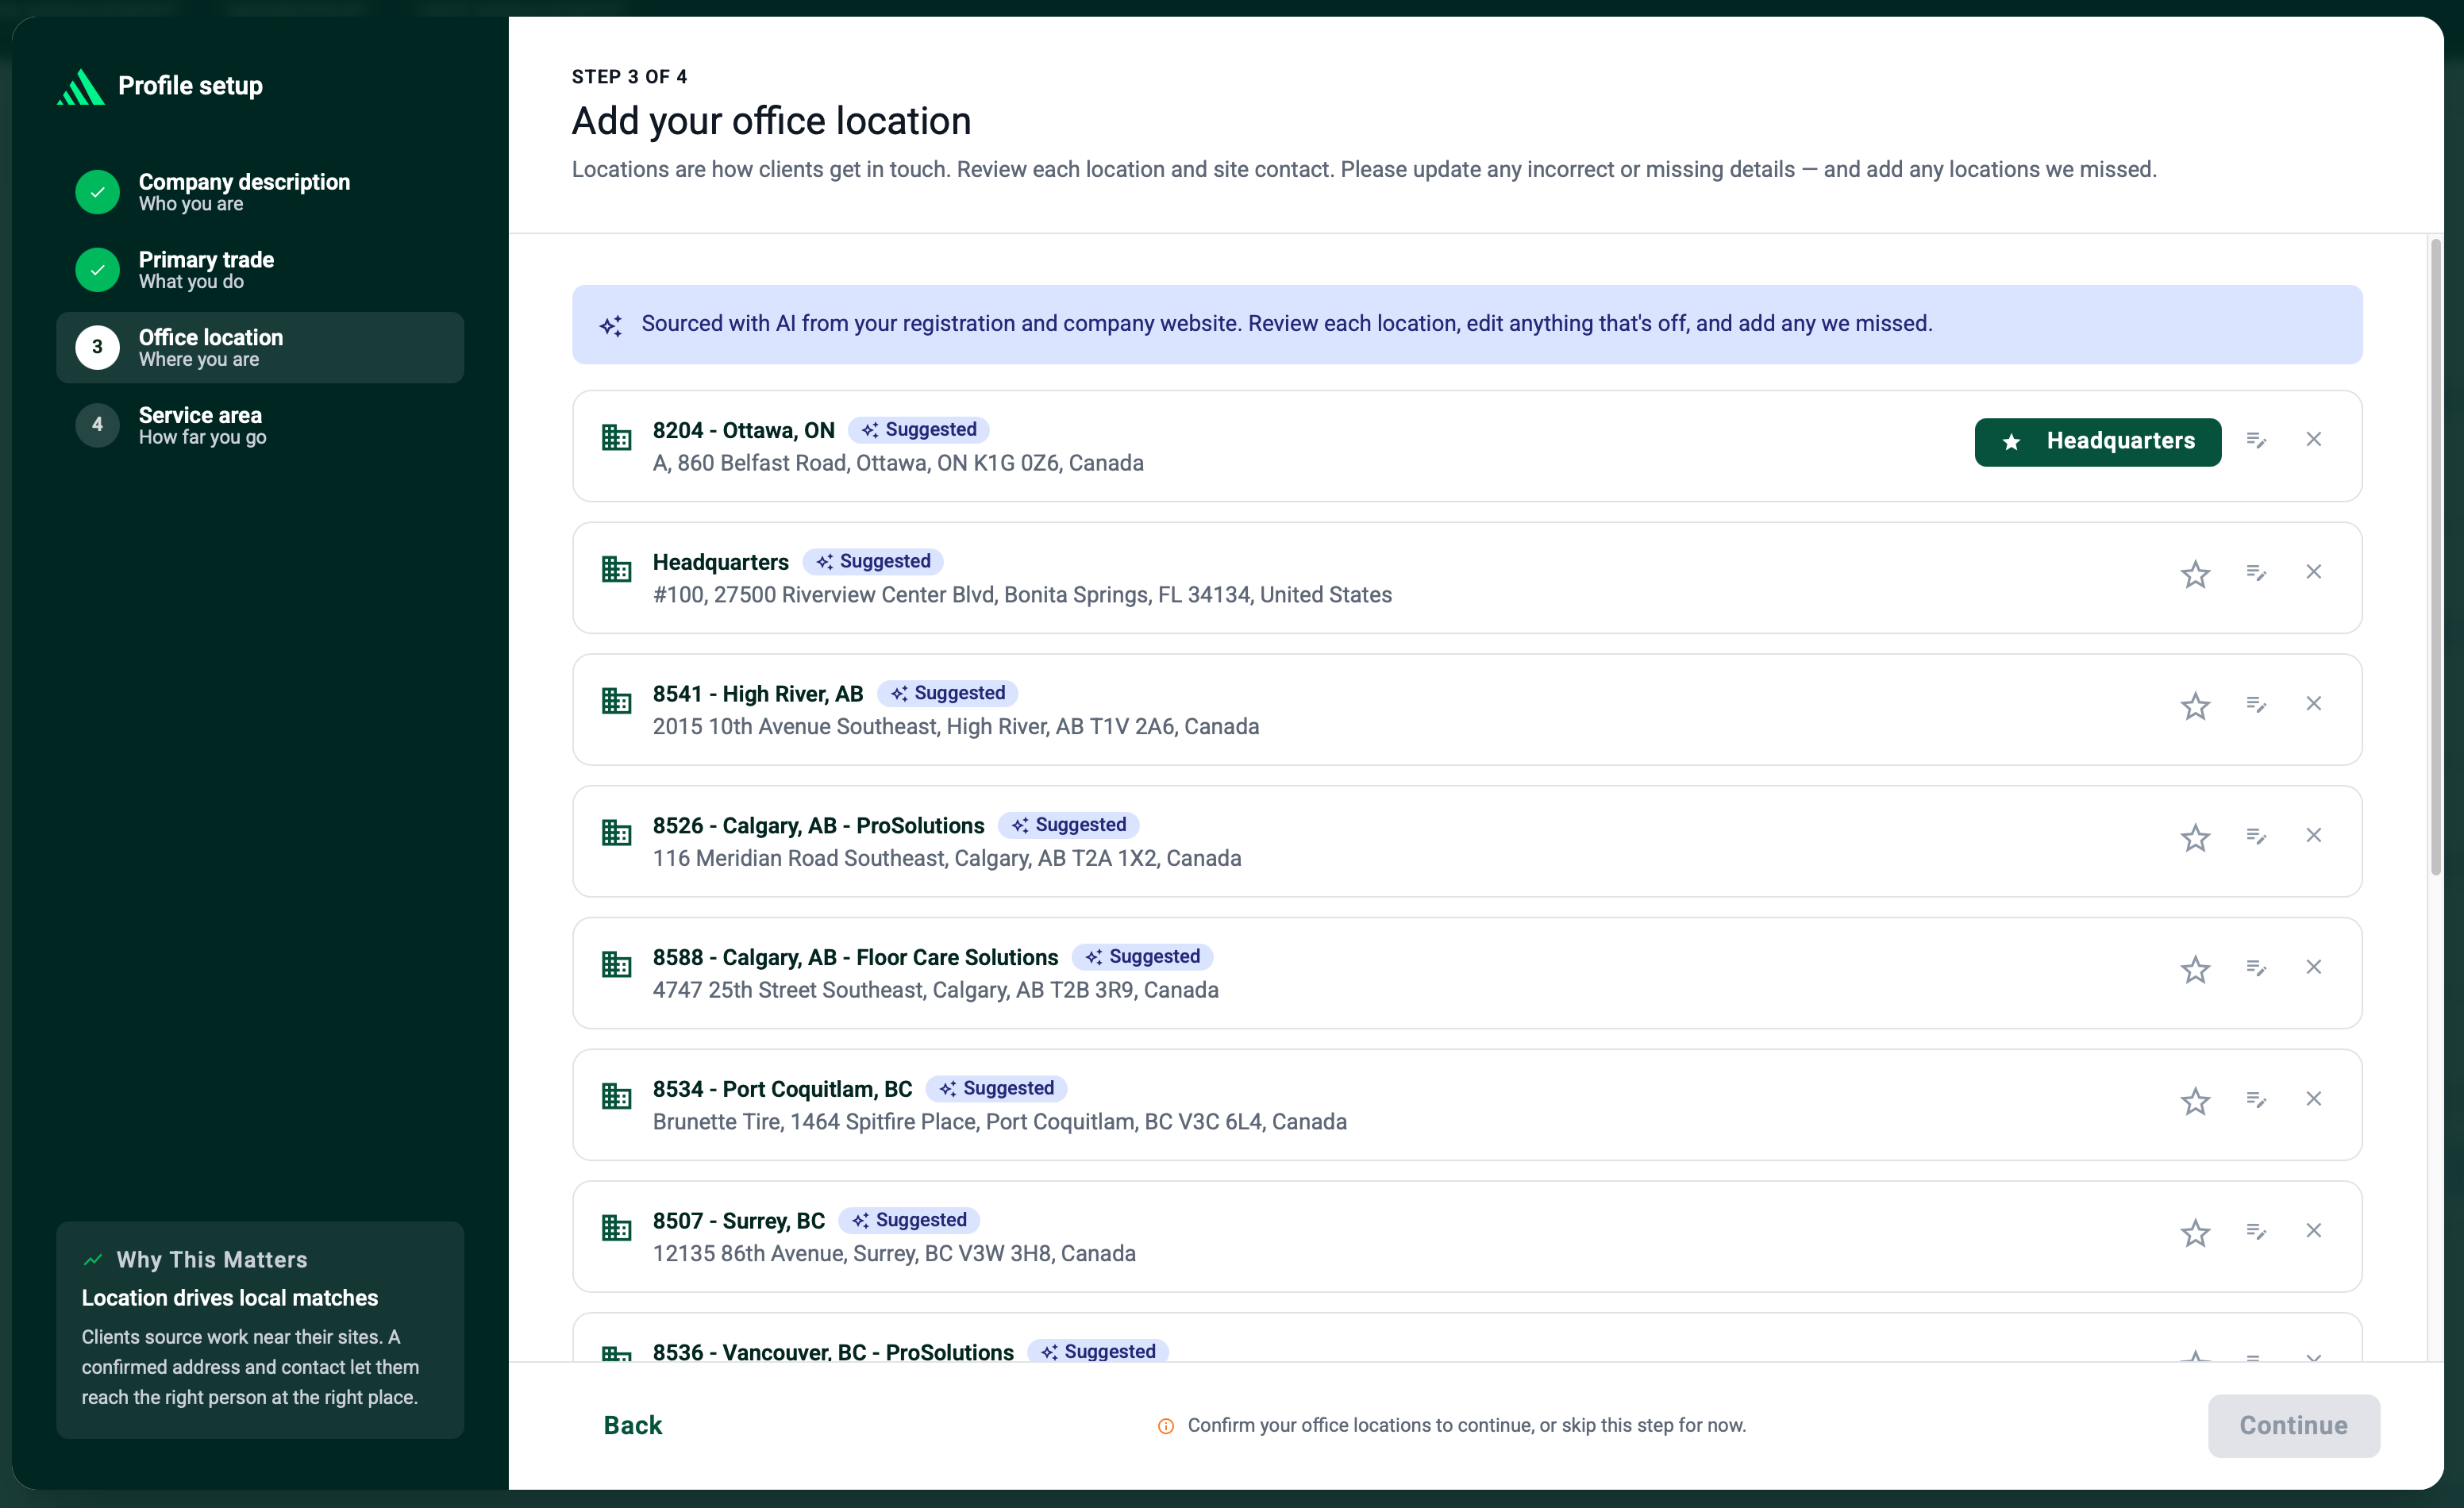
Office locations help Clients find Suppliers near them that they wish to work with. This section uses AI to source potential locations from your registration and company website.
- Review the listed locations for accuracy.
- Click the X icon to remove.
- Click the star icon to mark a location as your company headquarters.
- Click the pencil icon to edit a location.
- Click Continue when finished.
Set your service area
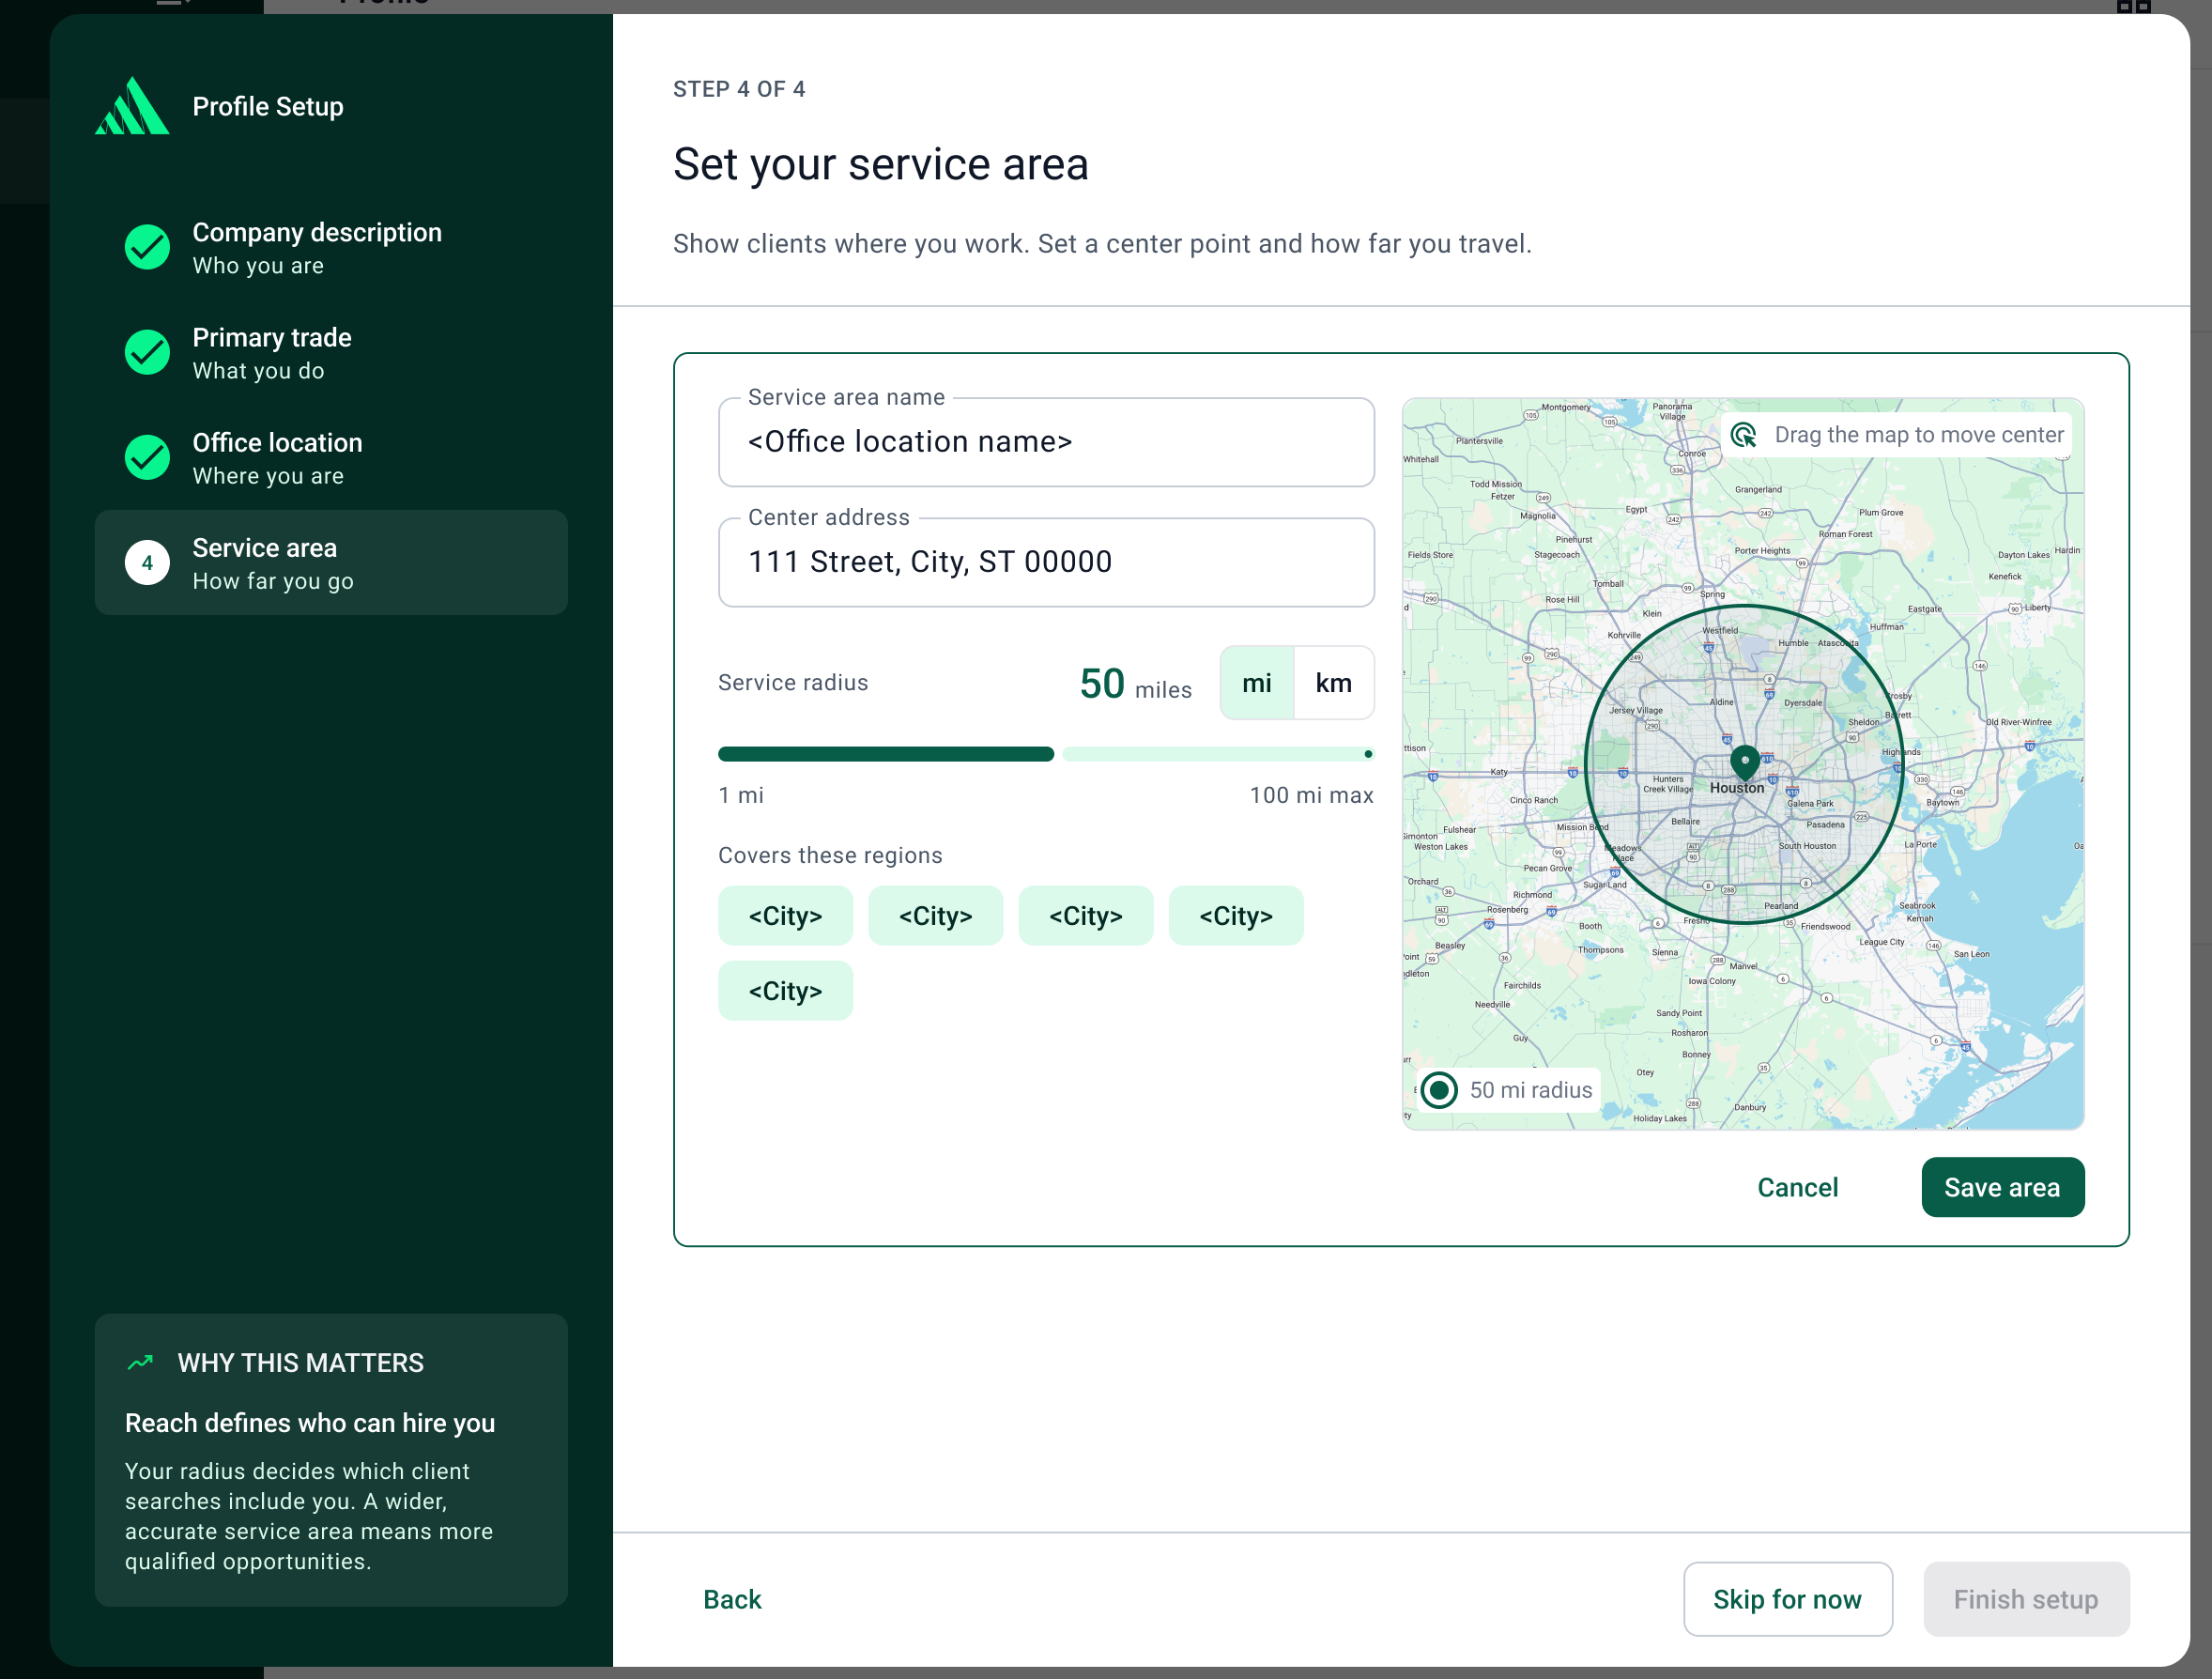
Your service area defines the radius from each location where you work. A more accurate service area will help surface more qualified opportunities. Suggestions are sourced with AI from your registration information and the office locations provided in the previous step.
- All office locations entered in the previous step will show. Click a location to set the service area.
- Name the service area
- Add the center address
- Select the mile radius and any nearby cities it covers.
- Click Save area to add as a service location.
- Click the pencil icon to edit any suggested service areas or the X to remove.
- Click Add another service area to create a new service area that may not be covered by a provided office location.
- Click Finish setup. A screen will showcase your profile completeness. From there, you can choose to go to your Profile page or your Home page.
Agreements and Policies
When you first register with Avetta, you will be asked to read and agree to the following agreements and policies:
Note: All agreements can be found by going to https://www.avetta.com/legal.
BACK TO TOP